
08 — Copilot in Forms
Your AI Usage Guideline has been presented to the team. Now you want to know two things: do they understand it, and is it actually useful? Copilot in Forms lets you build both a knowledge quiz and a feedback survey from your guideline document in minutes.
Prompts to Try: Open the copy-paste prompt exercises for this topic.
Continuing from Topic 07
You have the approved AI Usage Guide as a Word document and a PDF export. In this topic you will feed that document into Copilot in Forms to generate two things:
- A knowledge quiz to check whether staff have understood the key rules
- A feedback survey to find out whether the guideline is practical and clear
The responses you collect will be exported to Excel and analysed in Topic 09. You do not need to wait for real responses — the workshop sample dataset is pre-populated and ready to use.
Before you start: Make sure your AI Usage Guide is saved to your OneDrive. Copilot in Forms pulls files directly from your Microsoft 365 account. If you only have it on your desktop, upload it to OneDrive first.
What Copilot Can Do in Forms
- Generate a complete form or quiz from a document or text prompt
- Suggest question types (multiple choice, rating scale, Likert, open text)
- Recommend improvements to your form after generation
- Help you phrase questions clearly and without bias
- Distribute the form via link, QR code, or email
Getting Started: The Forms Home Screen
Access Microsoft Forms at forms.cloud.microsoft.
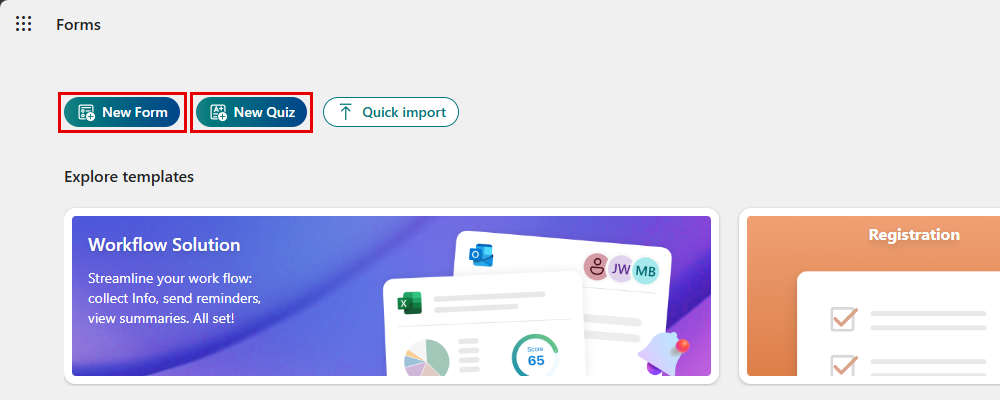
The Forms home screen. Click New Form to create a feedback survey or New Quiz to create a scored knowledge check. Quick import lets you import questions from an existing file, and Explore templates offers ready-made starting points.
For this workshop you will use New Quiz for the knowledge check and a separate New Form for the feedback survey.
Step 1: Attach Your AI Usage Guide
When the form or quiz editor opens, the Draft with Copilot box appears at the top. Click the paperclip to attach your document, then describe what you want (see prompts.md) and click the send arrow.
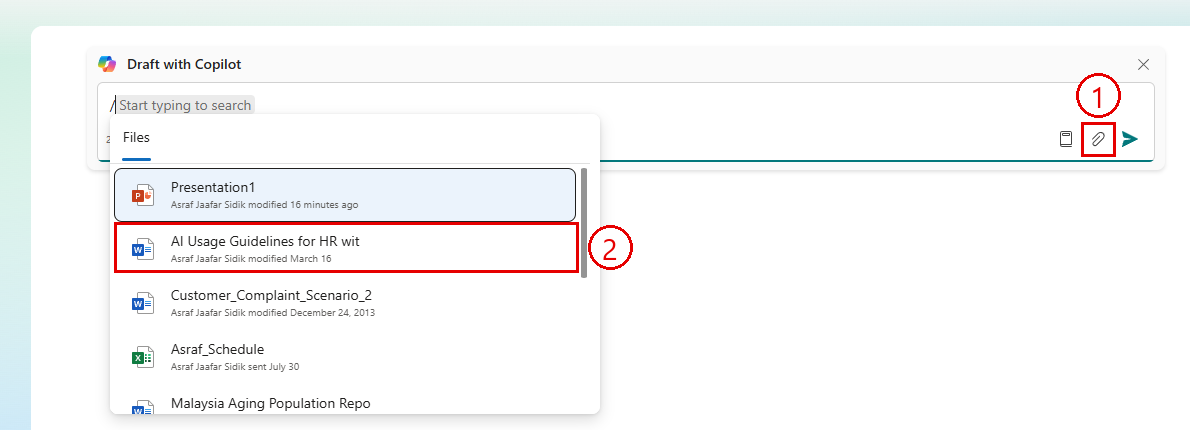
Callout 1: the paperclip icon to attach a file from your Microsoft 365 account. Callout 2: your AI Usage Guide document in the file list (type after the / to search). Select it as the source for Copilot to generate questions from.
Step 2: Review the Generated Form
Copilot first shows the draft questions in a preview (“Remove the questions you don’t want”), with the correct answers ticked and answer explanations included. At the bottom of the preview, you can keep the draft, regenerate it, delete it, or refine it.

Callout 1: Keep and continue with Copilot. Callout 2: regenerate. Callout 3: delete the draft. Callout 4: add more details for Copilot to fine-tune the draft.
When you click Keep and continue with Copilot, the questions are added to your form and a Copilot panel opens on the right. Copilot automatically reviews the form and lists suggestions to improve it.
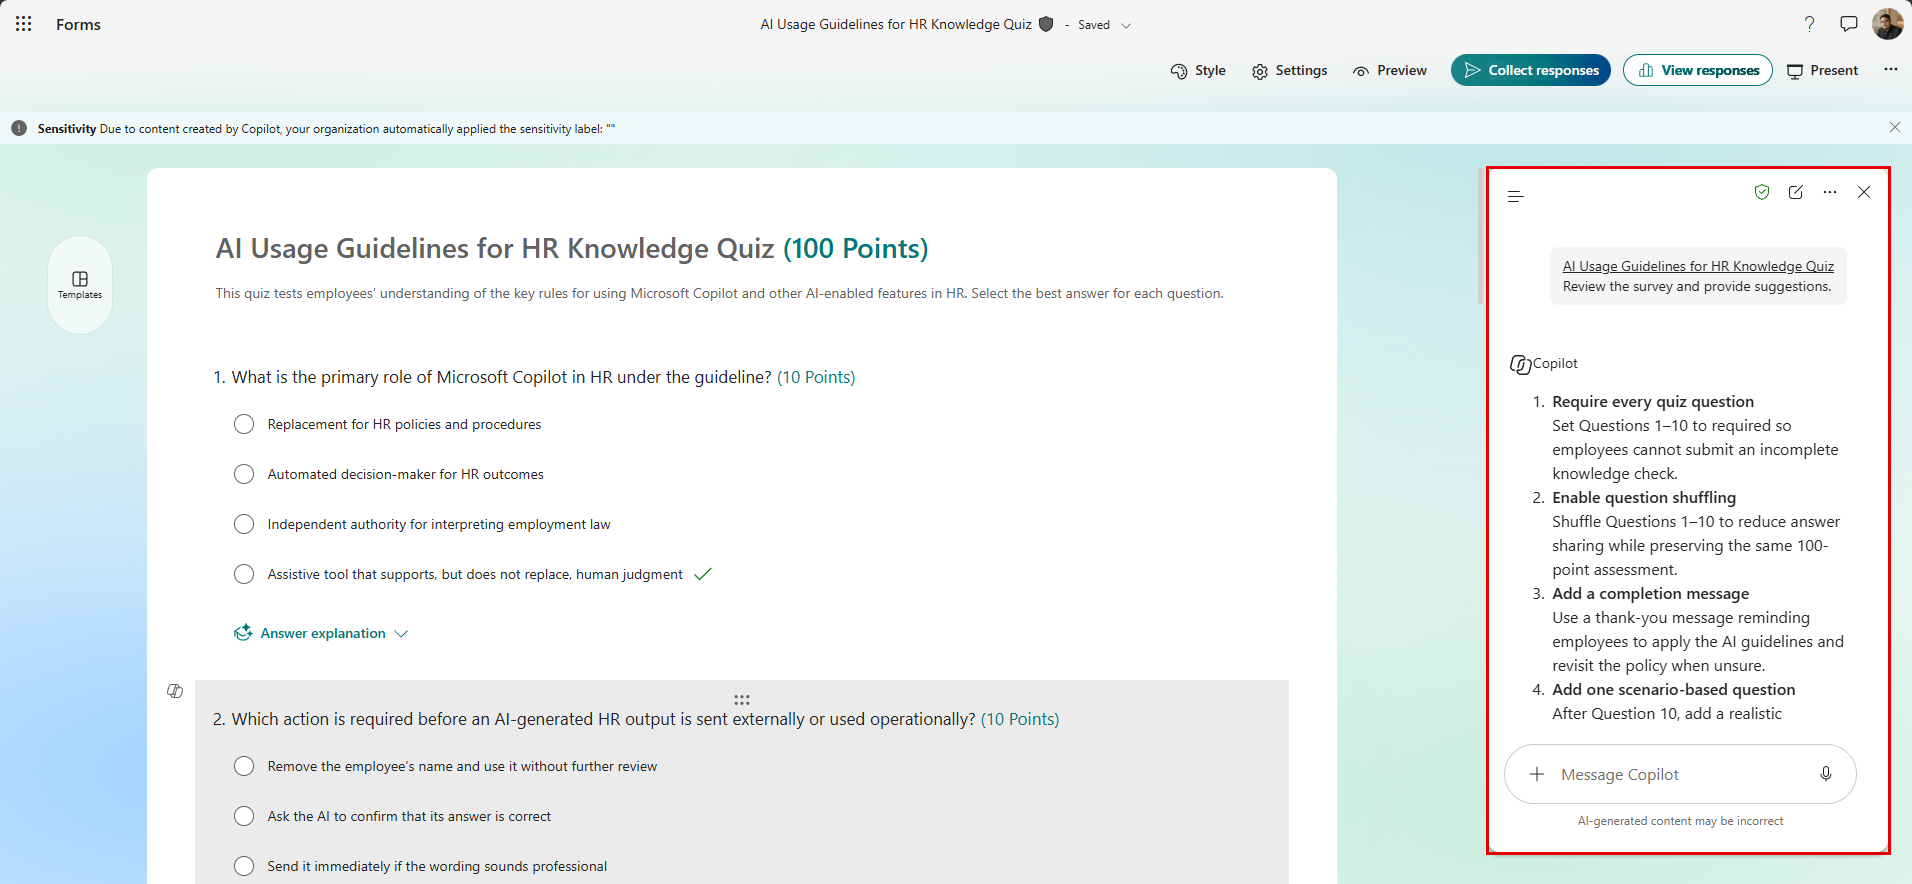
The kept quiz on the left, and Copilot’s review suggestions in the panel on the right.
Step 3: Review and Apply Suggestions
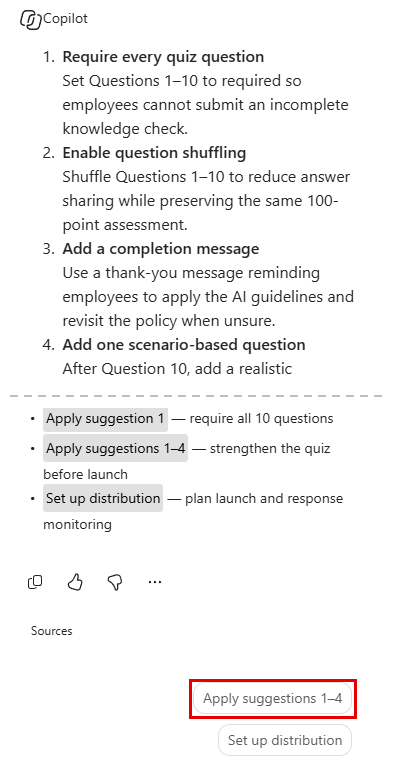
Copilot’s suggestions for the form. In this example it recommends requiring every question, shuffling questions, adding a completion message, and adding a scenario-based question. Click Apply suggestions 1–4 to apply them all, or type in the Copilot box to apply only the ones you want. Set up distribution helps you plan the launch.
Step 4: Collect Responses
Once you are satisfied with the form, click Collect responses in the top bar.

The Collect responses button in the top bar of the form editor.
This opens the distribution panel where you can configure how responses are collected.
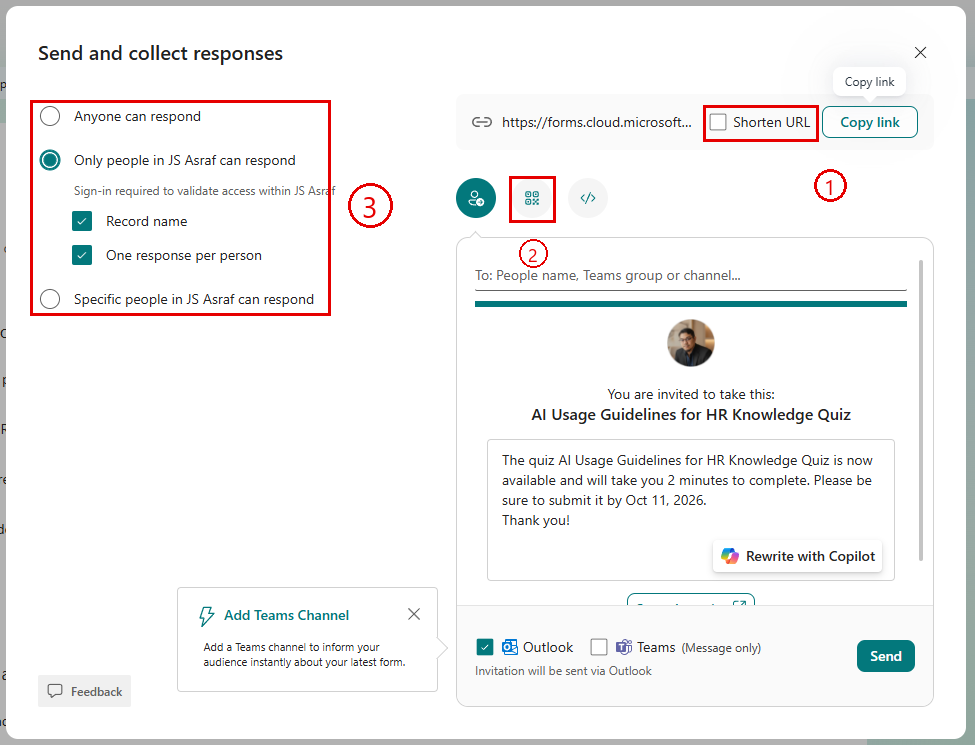
The Send and collect responses panel:
- Callout 1: Shorten URL gives you a compact link to share via email, Teams, or chat
- Callout 2: QR code — download and display it during your presentation so participants can respond immediately on their phones
- Callout 3: Access control — choose between anyone, only people in your organisation, or specific people. For a staff knowledge check, set it to your organisation only and enable “Record name” so you know who has completed it
Step 5: View Responses
After responses come in, click View responses in the top bar.

Click View responses (top bar) to see the Responses Overview — a live summary of all responses as they come in, with Back to questions to return to the editor.
Step 6: Export to Excel for Topic 09
This step is important. The Excel file you export here is what you will use for analysis in Topic 09.
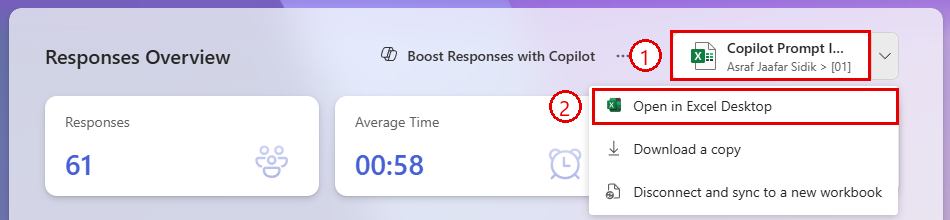
At the top right of the Responses Overview, your responses are already linked to an Excel workbook (callout 1) — click it to open the results in Excel for the web. Use the drop-down arrow for Open in Excel Desktop (callout 2), Download a copy, or Disconnect and sync to a new workbook.
Where to find the Excel file after exporting:
Microsoft Forms keeps the linked workbook in your OneDrive. The file is named after your form title, and the folder it lives in is shown under the file name on the Excel card. Clicking the card opens it immediately in Excel for the web.
To find it later:
- Go to onedrive.live.com or open OneDrive from the Microsoft 365 app launcher
- Search for your form title, or open the folder shown on the Excel card
- Look for a file with your form title ending in
.xlsx
Download: AI_Guideline_Survey_Responses.xlsx if you do not have real responses yet. It contains 100 simulated responses across 8 departments and is ready to use in Topic 09.
Tips for Copilot in Forms
- Generating from a document gives much better and more specific questions than generating from a text prompt alone. Always attach the source document.
- If Copilot generates questions that are too technical for your audience, ask it to simplify the language before keeping the draft.
- For a knowledge quiz, set the correct answers after generating. Copilot generates the questions and options but does not always mark the correct answer.
- Use the QR code option when presenting live so participants can respond on their phones immediately after the session.
- The Excel export updates automatically as new responses come in. You do not need to re-export every time.